Agent Skills – how to create and test them

Building Vibium Skills That Actually Drive Fixes


Introduction


This post is about turning a skills system into a real testing accelerator. I wanted a Vibium-only testing skill that would steer an agent away from Playwright and into purposeful negative tests. That meant carving out a dedicated SKILL.md file, proving the description would be recognised by an agent, and then watching it surface the right failures in the app so I could fix them.

It worked. The agent produced the failing tests, explained why they failed, I corrected the app behaviour, and a clean re-run confirmed the fixes.

As a bonus, I was even able to create a new skill to help me convert the current agent conversation into a blog post – this one in fact!


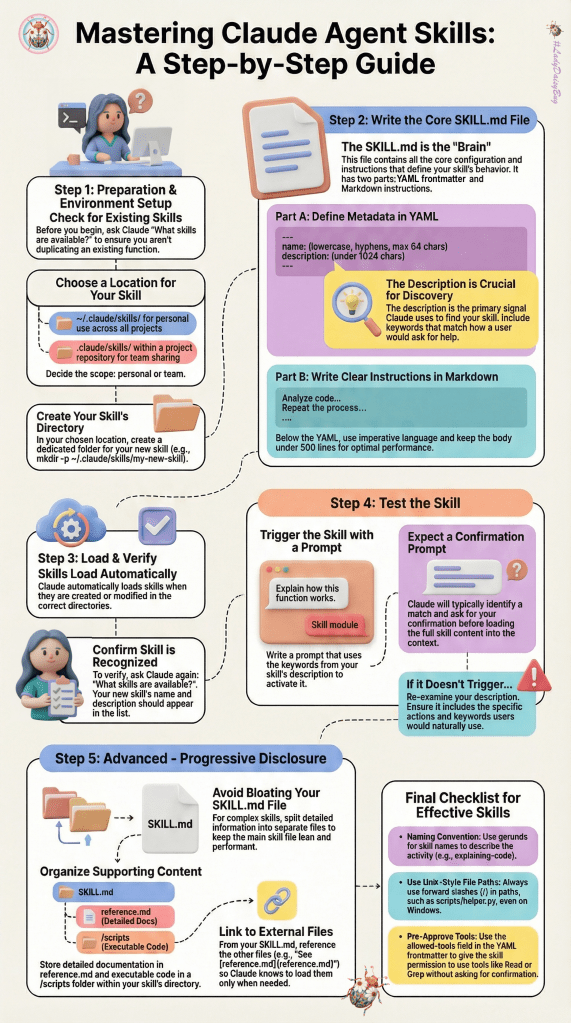
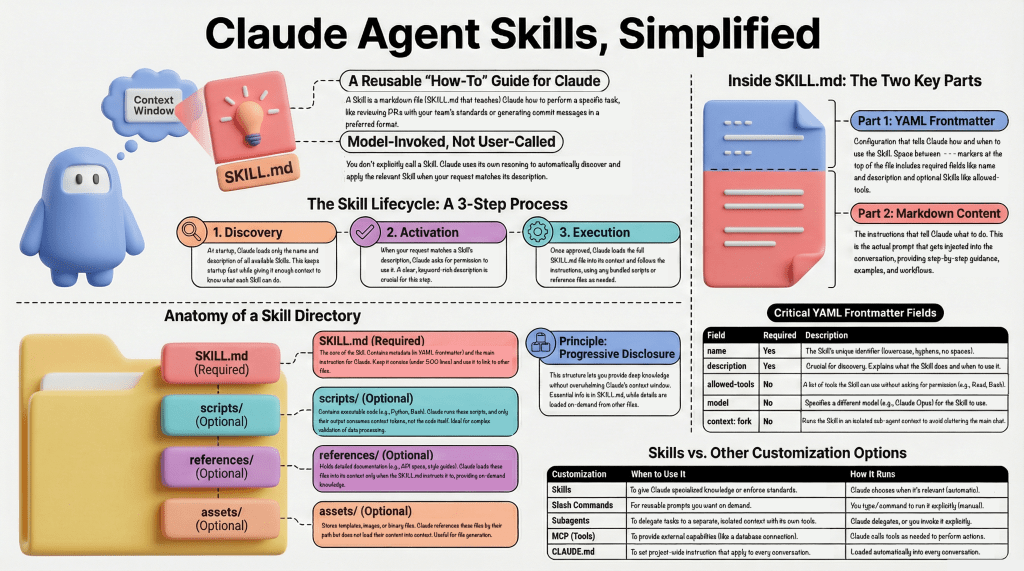
I used this document to guide me in how to create, verify and test Skills.md files

note: thankyou to Lana Begunova for posting these on the Vibium Discord channel this week.

Background: The Project Context

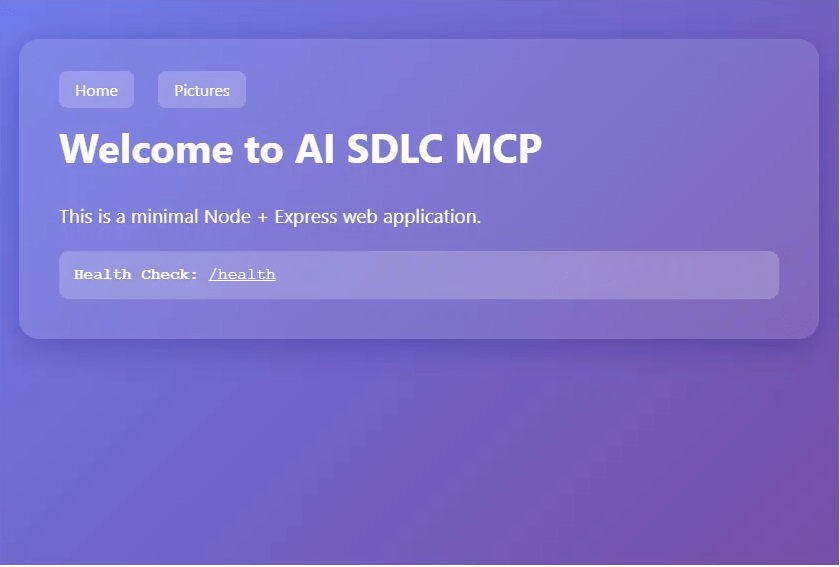
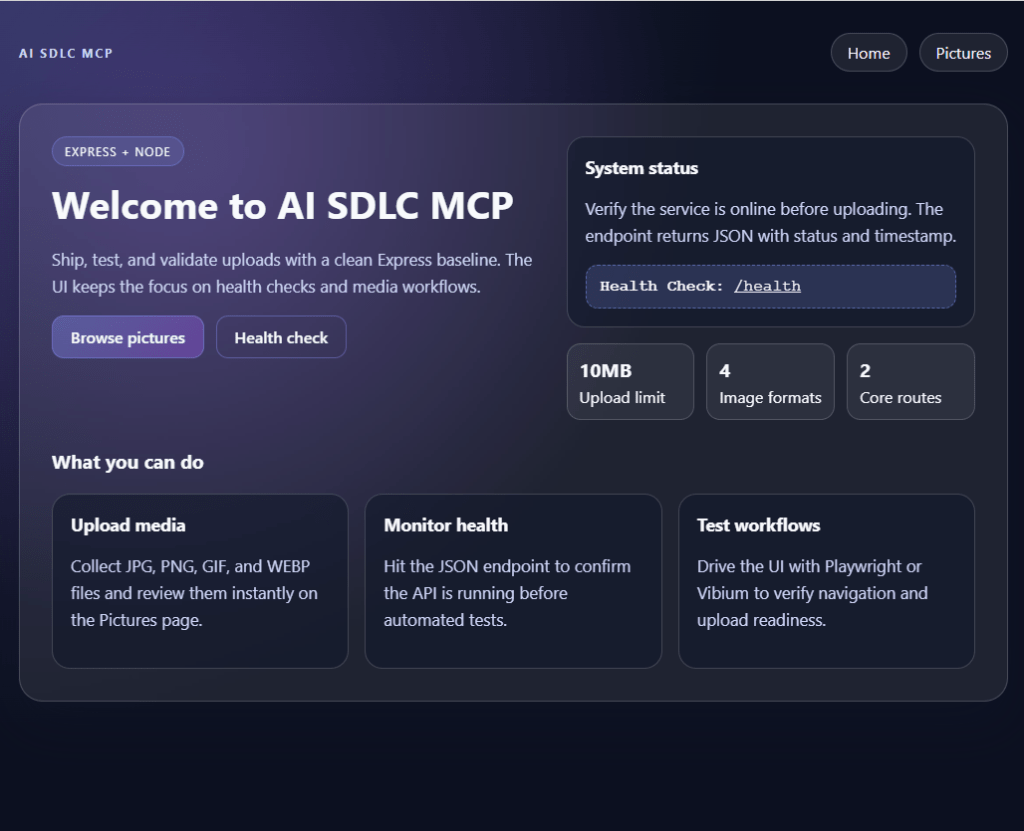
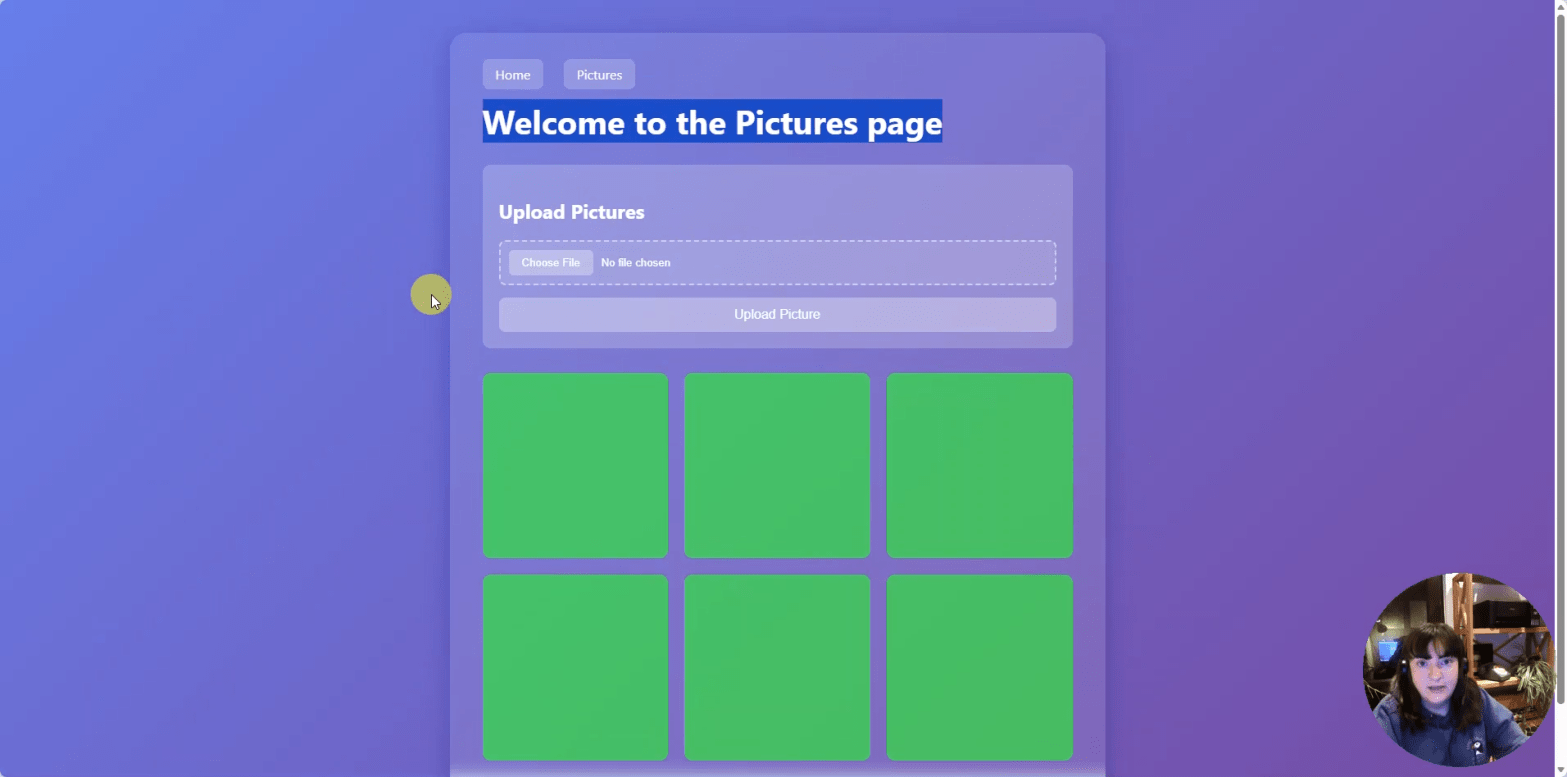
The project is a small Node.js + Express application with a basic health check and an image upload flow. Vibium is used for browser automation tests alongside Playwright, and Cursor skills guide how agents approach testing tasks.

Stack highlights:

Node.js + Express
Vibium for browser automation
TypeScript test files
Cursor skills to shape agent behaviour
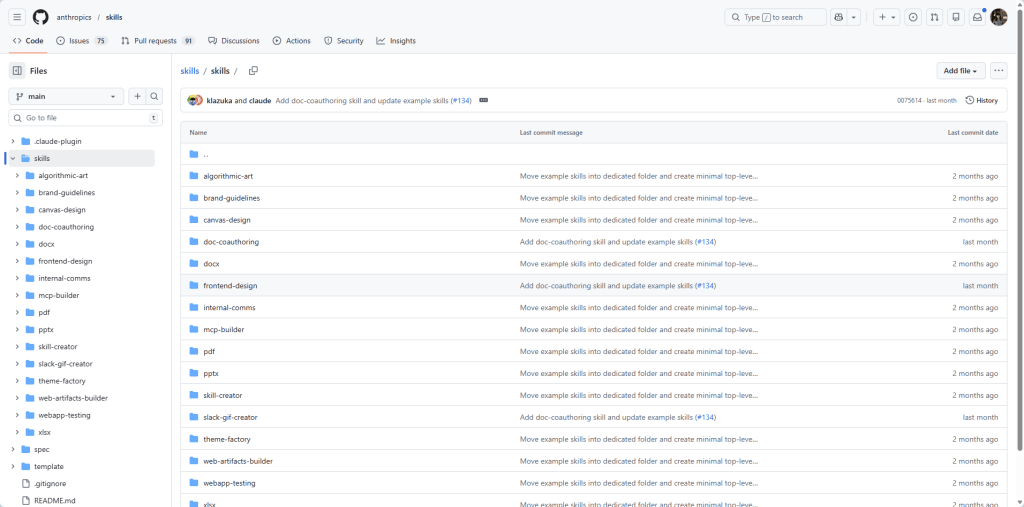
If you want the full codebase, it’s available here:
https://github.com/askherconsulting/AI_SDLC_MCP

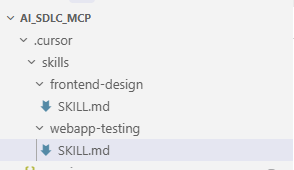
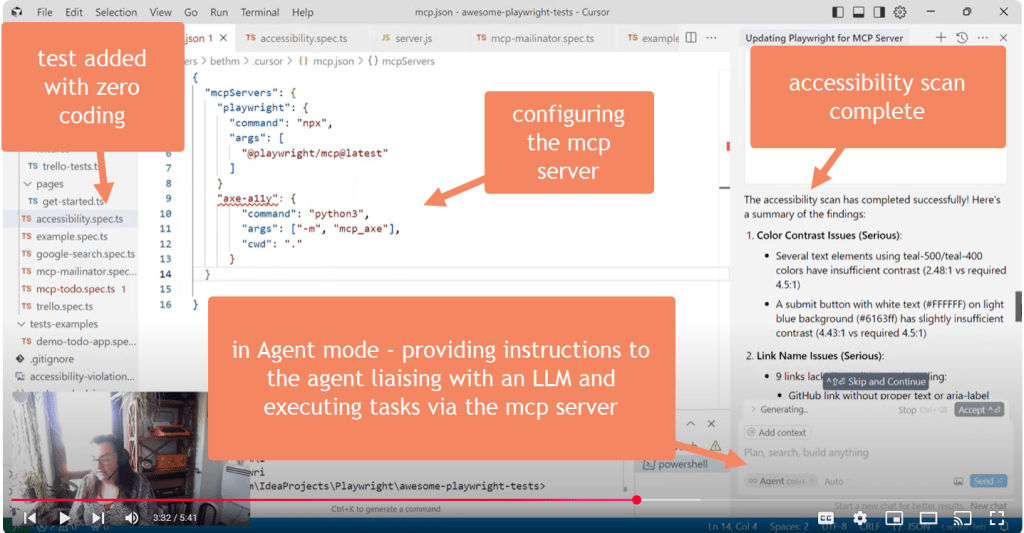
Step 1: Creating a Vibium-only Skill

The existing skills file mixed general testing guidance with Vibium notes. To make the agent reliably select Vibium (not recommended but required in order to confirm I could correctly isolate and test a skills file was being picked up and used), I created a dedicated skill by modifying the existing skill file and isolating only Vibium behaviour.

In practice, I:

Duplicated the original skills content
Removed anything Playwright-specific
Tightened the language to explicitly prefer Vibium APIs and helpers
Saved it as a new skills file focused purely on Vibium tests
That new skill became a single source of truth for Vibium test tasks and prevented drift into Playwright patterns. In reality – you wouldn’t have two test approaches in a single codebase, but this was the best way I had to prove skills worked well, so I ran with it.

Step 2: Proving the Skill Description Worked


An agent skill is only useful if an agent actually picks it up. To validate the description, I ran a quick check using the Claude CLI by asking it to write some Vibium only tests and tell me which, if any, skills file was utilised. The goal was simple: confirm that the skill text was specific enough for an agent to recognise and follow when asked to write Vibium tests.

The CLI output showed the agent selecting the Vibium skill and following its constraints. That gave me confidence the description was precise enough and the new file was discoverable in the skills folder.

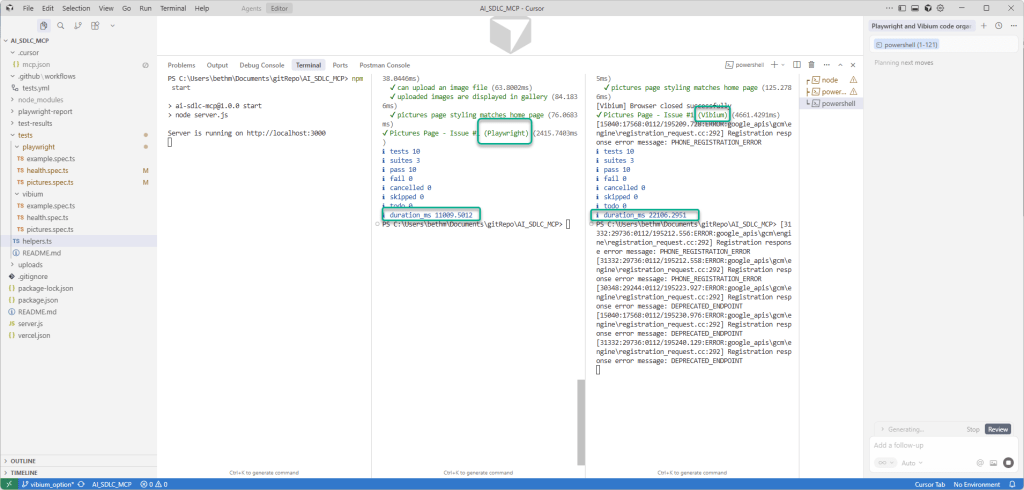
Step 3: Running the Vibium Negative Tests


With the skill in place, I asked the agent to write negative tests for the /health endpoint. The results were excellent:

The tests used Vibium only
They re-used shared helpers
They validated invalid paths and methods


What Failed and Why


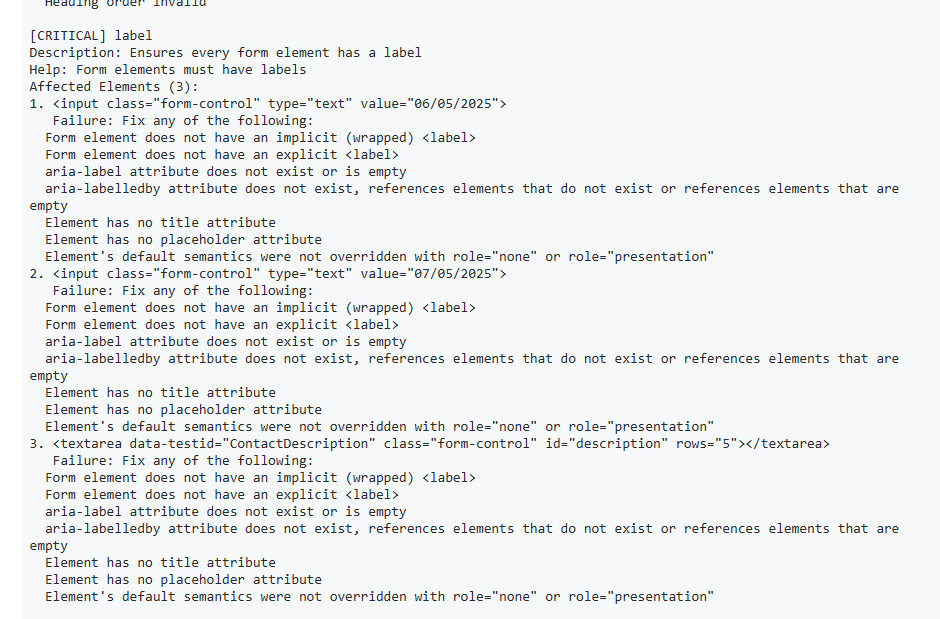
When I ran the new negative tests, a few failed in exactly the right way. The agent did not just report failures; it explained the why in plain language:

Trailing slashes were being accepted (Express treats /health and /health/ as the same path by default).
Case variations were being accepted (Express routes are case-insensitive by default).
That explanation mattered. It made it clear this was not a test problem; it was a routing behaviour issue in the app. So instead of wasting my time exploring whether it was a false positive or not, I could go straight to fixing things.

Step 4: Fixing the Underlying App


The fix was small but meaningful. I tightened the routing configuration to enforce exact path matches. This meant that only GET /health would return OK, and variations would be rejected.

With that change in place, I re-ran the same Vibium negative tests. They passed, and the agent’s reasoning lined up perfectly with the new behaviour.

Results: Failing Tests That Led to a Real Fix


This was the best part of the workflow:

The new skill directed the agent to produce Vibium-only tests
The tests failed for legitimate behavioural reasons
The agent explained the root cause clearly
I fixed the app configuration (or Cursor did!)
The exact same tests passed on re-run
That tight loop is the whole point of skills-driven automation: consistent test behaviour plus actionable feedback.

Key Takeaways


A focused skill file makes agent behaviour predictable.
Validating the skill description with Claude CLI avoids false confidence.
Negative tests are most valuable when they trigger meaningful app fixes.
Clear failure explanations speed up root-cause analysis.


Conclusion


By isolating Vibium behaviour into its own skill and verifying the description with Claude CLI, I had confidence in my SKILLS.md file – it was being picked up and used correctly. Modifications to it were also being picked up. Useful insight that I’ll be able to take forward with me when creating new skills files in the future.

Repo: https://github.com/askherconsulting/AI_SDLC_MCP

Tags: Testing, Node.js, Express.js, Vibium, Agent Skills, Negative Testing, API Quality
Creator: Created by AI, reviewed by a human (me!)
Reading Time: ~6 minutes

Enhance Your App with Agent Skills: A Practical Guide

In my previous two blog posts I discuss my learning project of:-

* building an initial [Agentic SDLC demo] with Playwright
* extending the demo with Vibium

In this post, I detail how I added Agent Skills files and the difference this made to the quality of my app.

What are Agent Skills?

You can read all about agent skills here: https://www.anthropic.com/engineering/equipping-agents-for-the-real-world-with-agent-skills
but here is Anthropics definition:-

[Agent skills are] organized folders of instructions, scripts, and resources that agents can discover and load dynamically to perform better at specific tasks. Skills extend Claude’s capabilities by packaging your expertise into composable resources for Claude, transforming general-purpose agents into specialized agents that fit your needs.

How were Agent Skills useful in my context?

Given I now had a working basic demo, with accompanying test cases, I wanted to see if this could be improved using agent skills. I perused the existing Anthropic skills and saw there was a skill on frontend design. I wondered what difference this could make to my solution.
https://github.com/anthropics/skills/tree/main/skills

A screenshot from Anthropics Skills Git repo showing existing SKILLS.md files

I added the SKILLS.md file into my project under .cursor, as directed by the agent, along with a skill for webapp-testing:-

folder structure of my demo project

At the moment, agent skills can also be used in Visual code with any coding agent you wish e.g. Github Copilot.

What happened next?

Well, I span the solution up, so I could remember the “before” app:-

image of demo app before using Agent files.

Then I entered the following prompt:-

Text shows Cursor agent prompt

The results?

new design as a result of using Agent skills file
text shows cursor responding to list how the skills files assisted the redesign and test upgrade activities

Whilst there is clearly work to do here to refine this – e.g. not sure why we need to go all meta and talk about how the UI keeps focus, or include test workflows in the app itself – I do think the design aesthetics are a big improvement on what Cursor agent gave out of the box. Furthermore, I now have my own file that I can update which I can reuse to apply the same design every time I need to repeat this activity, without the same heavy token use.

Token use

I’m going to be paying more attention to this in future, but here are the headlines:-

Adding Vibium and updating tests – 146K tokens used

Using skills to redesign and upgrade tests – 54K tokens used

How are Agent skills different?

Previously, I’d been expoloring chatmodes, instructions, prompt.md files etc. to provide instructions for an agent to make a task more:-

  • repeatable
  • easier to complete with a simple prompt (as the heavy lifting instructions were abstracted away)
  • fewer token use (as files were only fully called when the user asks for a prompt for that specific activity e.g. create an accessible test case)
Copilot generated table showing key differences between different approaches

Summary

I would need to do far more experimenting to really understand how Agent skills can help me, but they definitely seem to be a useful thing to know about. Of course, doing is the best way to get your head around stuff, so if you wanted to check out my github repo then you can find it here:

https://github.com/askherconsulting/AI_SDLC_MCP

Extending My Agentic SDLC Demo: Adding Vibium Test Support Alongside Playwright

*Posted by Beth Marshall | January 12, 2026 – hand reviewed but drafted by Cursor*

After building my initial [Agentic SDLC demo] with Playwright, I wanted to explore supporting multiple browser automation frameworks. This would demonstrate framework flexibility and provide a comparison point between different testing tools. I decided to add **Vibium** support alongside the existing Playwright implementation.

Now there are a few things to note here:-

  1. I appreciate that you’d never normally need to put two automation mcp servers in the same solution side by side. It duplicates test code and for anything other than a demo it is not a good idea.
  2. Vibium is still new in its journey (only released Christmas ’25) and has a lot of cool features still being worked on – see its Roadmap for full details. I tried to make sure the tests had feature parity and similar coverage between the two frameworks for a fair comparison, but it would be worth expanding the tests and repeating the exercise as both Vibium and Playwright evolve.

TLDR: Where’s the code

You can check out the completed code here: https://github.com/askherconsulting/AI_SDLC_MCP

## The Goal

I wanted to maintain both Playwright and Vibium implementations in the same codebase, ensuring:

– Both frameworks test the same functionality

– Tests can run independently or together

– The codebase remains maintainable and well-organized

– CI/CD works seamlessly with both frameworks

## Organizing the Code Structure

The first challenge was organizing the code to support both frameworks without duplication or confusion. I settled on a clear directory structure:

“`

tests/

├── helpers.ts              # Shared utilities (framework-agnostic)

├── playwright/             # Playwright test implementations

│   ├── example.spec.ts

│   ├── health.spec.ts

│   └── pictures.spec.ts

└── vibium/                 # Vibium test implementations

    ├── example.spec.ts

    ├── health.spec.ts

    └── pictures.spec.ts

“`

This separation keeps each framework’s tests isolated while sharing common utilities like server health checks.

## Key Implementation Challenges

### 1. Test Parity

**Problem:** Playwright had additional test coverage (file uploads, computed styles) that Vibium couldn’t easily replicate.

**Solution:** Aligned both test suites to have equivalent coverage:

– Removed Playwright’s actual file upload (kept form validation only)

– Removed computed style verification (kept element existence checks)

– Standardized waiting strategies (using timeouts instead of framework-specific wait methods)

This ensures both frameworks test the same functionality, making comparisons fair and meaningful.

### 2. CI/CD Integration

**Problem:** Vibium tests were unreliable in GitHub Actions, timing out or failing due to missing dependencies. Could well have been an error in my understanding, but Playwright tests ran immediately and despite multiple efforts I just couldn’t get the Vibium tests to work. I did ensure both still work locally though, and the README.md provides the requisite commands.

**Solution:**

– Initially tried running both frameworks in CI

– Encountered issues with Vibium’s browser launch in headless CI environments

– Decided to run only Playwright tests in CI for reliability

– Vibium tests remain available for local development

The workflow now:

– Installs Playwright browsers

– Runs Playwright tests

– Vibium tests can be run locally with `npm run test:vibium`

There were various other technical issues which required Cursor and myself to fix, but the whole thing was the result of an hour or so of work.

## Final Test Structure

Both test suites now cover the same functionality:

1. **Homepage** – Verifies page loads with correct heading

2. **Health Endpoint** – Validates JSON response structure

3. **Pictures Page** – Tests:

   – Page content and headings

   – Navigation links

   – Navigation functionality

   – Upload form elements

   – Empty state message

   – Form validation (without actual upload)

   – Gallery image display

   – Container element consistency

## Running the Tests

The project now supports multiple test commands:

“`bash

# Run all tests (both frameworks)

npm test

# Run only Playwright tests

npm run test:playwright

# Run only Vibium tests

npm run test:vibium

# Run both frameworks sequentially

npm run test:all

“`

## Performance Results – headless mode

Playwright tests executed twice as fast – would need more experimentation to confirm

## Key Learnings

1. **Framework Comparison:** Having both implementations side-by-side makes it easy to compare API differences, performance, and capabilities.

2. **Platform-Specific Dependencies:** `optionalDependencies` is essential for packages that only work on specific platforms.

3. **Auto-Configuration:** Helper functions that auto-detect and configure environment variables reduce setup friction for developers.

4. **Test Parity:** Aligning test coverage ensures fair comparisons between frameworks.

5. **CI/CD Pragmatism:** Sometimes it’s better to run the most reliable tests in CI and keep others for local development.

6. **Cross-Platform Scripts:** Explicit file lists are more reliable than glob patterns across different shells.

## What’s Next?

This dual-framework setup provides a solid foundation for:

– Comparing framework performance and reliability

– Demonstrating framework flexibility in portfolio projects

– Learning different browser automation APIs

– Building more robust test suites that aren’t tied to a single framework

The codebase is now a living example of how to maintain multiple testing frameworks in harmony, with shared utilities and equivalent test coverage. Interestingly, the playwright tests are currently a little faster than vibium, but that seems to be due to a chrome.exe authorisation check and failure taking extra time.

I think further exploration would of course need to optimise for areas like security, accessibility and other important devops concerns. This isn’t an enterprise or scalable solution, but nor is it a codebase that that the LLM hasn’t already been trained on.

## Resources

– [Original Agentic SDLC Demo Post](https://beththetester.com/2026/01/10/how-i-built-an-agentic-sdlc-demo-with-cursor-mcp-servers-playwright-github-and-vercel-in-under-an-hour/)

– [Playwright Documentation](https://playwright.dev/)

– [Vibium GitHub](https://github.com/vibium/vibium)

– [MCP Servers](https://modelcontextprotocol.io/)

*This post demonstrates how to extend an existing project to support multiple testing frameworks while maintaining code quality and test coverage parity.*

How I Built an Agentic SDLC Demo with Cursor, MCP Servers, Playwright, GitHub, and Vercel in Under an Hour.

I’ve been enjoying playing around with all things AI a fair bit of late. I still obviously feel out of my comfort zone with a lot of it, but I wanted to explore one topic that keeps popping up:- the idea of incorporating AI into the whole SDLC. This feels like pie in the sky at the moment, but is something I wanted to explore, using free tech that already exists.

Eventually, there’s a possibility the whole SDLC (requirements -> code -> tests -> deployment) will be done with a limited number of human checkpoints, and agents carrying out a lot of the work. Heck, you might already be there dear reader.

However, to improve my understanding, I wanted to build something from scratch which demonstrated the power of using pre-built mcp servers and cursor to orchestrate most of the work: scaffolding, tests, git operations, CI, and deployment.

The app and tests were of course basic, but I got this working end to end – having never used some of the tech before – in less than an hour. The only things I used to guide me were the MS copilot app to instruct and help debug. This post walks through what I did, the problems I hit (and how I fixed them).

TLDR: here’s a video walkthrough of the solution.

Summary

  • Goal: Show a portfolio video that walks through a codebase where most SDLC steps are handled by MCP servers via Cursor. Zero hand written code.
  • Core components: Cursor (IDE + AI), MCP servers (filesystem, Playwright, Git), Playwright tests, GitHub repo + Actions CI, Vercel deployment.
  • Outcome: Working demo with automated tests and deployment; fixes included Playwright CLI changes and Vercel routing for serverless/SPA apps and manually needing to step in to fix Git MCP server configuration. A good baseline for further exploration.

What I built

A minimal web app (Node/Express or static SPA) that:

  • Exposes a simple UI and a /health endpoint for tests.
  • Has Playwright end‑to‑end tests that run locally and in GitHub Actions.
  • Uses MCP servers in Cursor to generate and run tests, interact with git, and orchestrate tasks.
  • Deploys to Vercel and serves the app publicly.
  • Demonstrates the full flow in a recorded walkthrough: requirements → scaffold → tests → CI → deploy.

Technical stack and roles

  • Cursor — central environment for AI prompts, MCP orchestration, and editing.
  • MCP servers — adapters that expose tools to Cursor (e.g., playwright-mcp-server, @modelcontextprotocol/server-git).
  • Playwright (@playwright/test) — test runner and browser automation for e2e tests.
  • GitHub — repo hosting, issues for requirements, and Actions for CI.
  • Vercel — hosting and deployment.

Key fixes and gotchas

Playwright CLI change

  • Problem: npx playwright init returned unknown command 'init'.
  • Fix: Install the test runner and browsers explicitly:

npm install -D @playwright/test npx playwright install Scaffold tests manually (create tests/ and playwright.config.ts) and run with npx playwright test.

MCP server config

  • Use a .cursor/mcp.json with entries that start the MCP server binaries. Example:

{ “mcpServers”: { “playwright”: { “command”: “npx”, “args”: [“-y”, “playwright-mcp-server”] }, “git”: { “command”: “npx”, “args”: [“-y”, “@modelcontextprotocol/server-git”] } } }

  • Ensure the package you call exposes a binary with that name or install it locally/globally first.

Vercel 404 after deploy

  • Common causes: wrong project root, missing build output, or server framework mismatch.
  • Fixes:
  • For Express apps, convert to a serverless function and add vercel.json (this had to be done via a new prompt in cursor but worked immediately)
  • Accounts
    • GitHub (free) — repo, issues, Actions.
    • Cursor (free tier) — AI + MCP orchestration.
    • Vercel (free tier) — deployment.
  • Local setup
    • Install Node.js and Git.
    • Create repo mcp-sdlc-demo and open it in Cursor.
    • Scaffold minimal app and add npm scripts.
  • Playwright
    • npm install -D @playwright/test
    • npx playwright install
    • Add tests/example.spec.ts and playwright.config.ts.
  • MCP
    • Add .cursor/mcp.json with playwright and git servers.
    • Install any MCP server packages locally if needed.
  • CI and deploy
    • Github actions and Vercel

How to use Playwright and AI to write a blog post

THIS POST WAS WRITTEN BY AI

In this blog post, I’m going to show you how to use Playwright and AI to write a blog post.I’ll be using the Playwright MCP extension for VS Code Insiders, which allows you to use natural language to interact with the browser. This means that you can write commands in plain English, and the extension will translate them into Playwright code. This is a huge time-saver, as it means that you don’t have to spend time looking up the correct syntax for Playwright commands.I’ll also be using GitHub Copilot to help me write the blog post. GitHub Copilot is an AI pair programmer that helps you write code faster. It can suggest whole lines or even entire functions right inside your editor.I’m going to start by creating a new Playwright test. I’ll then use the Playwright MCP extension to navigate to my blog and create a new post. I’ll then use GitHub Copilot to help me write the content of the blog post. Finally, I’ll use the Playwright MCP extension to publish the blog post.I hope you enjoy this blog post!

Exploring MCP Servers: Axe-MCP, cursor and Playwright for AI-Driven Accessibility Testing

I’ve been exploring a few open source MCP (Model Context Protocol) servers recently.

TL:DR

Here’s a youtube video with how I got on with the Axe-MCP server:-

YouTube Video demoing the MCP-Axe Server

The latest one that caught my eye was Axe MCP – an MCP compatible plugin for automated accessibility scanning. Shout out to Joe Colantonio’s Test Guild for his mega weekly series which brought my attention to this. Click the image to listen to the podcast. I definitely recommend connecting with TestGuild on LinkedIn and subscribing if you’re interested in the latest news.

I had a spare half an hour, so I thought I’d try it out.

The experiment

I had an existing Playwright framework which was basically the templated one you get when you install playwright, nothing fancy. I wanted to add a test to perform an accessibility scan using axe-core, driven by the MCP through my cursor IDE.

The Results

I was pleasantly surprised – in under 5 minutes and just two natural language prompts to my cursor agent this setup was able to:-

  • Install and Add the MCP Server
  • Add an accessibility scan test
  • Execute the test
  • Learn and iterate on the code – the initial test failed as chromium browser had not been installed, so this was automatically fixed (I was asked for permission)
  • Execute the test again
  • Summarise the accessibility findings in the accessibility report live in the chat
  • Attach the stout accessibility report to the standard playwright test results html report

Take a look at the youtube video at the top of this page for the full details.

I think if you are interested in getting engineers to the point where they are adding value faster, provided the scans perform similarly to those generated with more traditional methods (be they “manual” or coded using Selenium commands for example) using MCP could be a way to get this off the ground a lot faster.

Not only that, but seemingly being partially self-healing could help reduce debugging time even more – that is, if you know what you’re doing and can course correct the Agent if it goes off track.

Things to be aware of

Its best to be very mindful of security of any open source MCP server. Security concerns are rife, and the importance of reviewing the code and keeping the human in the loop can’t be underestimated either.

Also, being created by a single user, this plugin is not officially affiliated with Axe from what I can see, which may cause maintenance and support issues down the road. I’m in awe of anyone who gives up their time to write open source software though, so huge kudos to Manosh Kumar for getting this over the line.

I haven’t experimented with this on other websites, so its possible I’m seeing a curated version of the output – I’d like to do a like for like with similar automated tests written in the traditional way to compare output if I were doing a full evaluation. UPDATE – I did try on Mark Winteringhams newly updated test website https://automationintesting.online/ and it successfully failed with critical accessibility issues detected:-

The playwright test results report generated by the Agent
details of the critical issue found which failed the test

Finally, as with anything accessibility related, it isn’t possible to automate 100% of the testing – so please do not view this mcp extension as a replacement for traditional accessibility testing techniques.

Happy Testing!

Experimenting with AI Agents: sending Mailinator emails with Zapier MCP, Goose and CursorAI

So in my recent posts, I’ve been exploring AI and agentic AI:-

I heard on the LinkedIn grapevine the news that workflow automation specialists Zapier have embraced the MCP bandwagon and decided to serve up all of their integrations via the MCP route. Thanks for the heads up Angie.

This will allow AI Agents to interact with these integrations, and opens up a lot of experimentation opportunities for someone like me (read: a little techie but not a total techie) to learn more about this evolving technology.

Angie Jones LinkedIn post where I first heard of Zapier MCP server

Here are a couple of experiments I tried with this. I’ll come back and update this post if I get any of the failing ones to work.

1. Connect to the Zapier MCP Server and use it to Send an Email to Mailinator

This was surprisingly straightforward – although the Zapier docs are well known for being ridiculously user friendly, so it shouldn’t have really come as a surprise. If you are thinking of setting up and documenting your own MCP server, definitely check out their docs.

  1. setup

All I needed to do here was to follow the on screen guide – generate my MCP endpoint (think API key):-

Then I configured the action I wanted to. I selected the POST message action of the Mailinator Zap, because I was familiar with this so it was easy to check if it was working. Plus I could see a potential use case here for folks wanting to use an AI Agent to test their email flows.

I clicked the configure the actions link, and selected the action I wanted to configure by searching for it:-

searching for action from one of over 8000 possibilities on Zapier

I followed the prompts and the links to add a webhook token (generated from my Mailinator account) into the action, so that it could connect:-

Adding Webhook token

Once I’d done this, it was a case of modifying the action to decide what I wanted to happen when this action got triggered. I could select:-

  • hard-coded values (e.g. FROM email address)
  • Let AI choose

I could also require a preview before running – which could be a very useful feature if testing this in production for example. #humanInTheLoop

MCP action configuration

Once the action was configured and enabled, I didn’t even need AI to test it out – I could do this from the beta demo option in Zapier itself.

where to try out an action before plumbing it into an agent

Then it was simply a case of making any final adjustments and hitting Run

Test actions page within Zapier to add final configuration before trying out

Result

It worked! Check out me running the action on the Zapier MCP Server here, and it sending an email to Mailinator.

Connect open source agent Goose to the Zapier MCP and use it to execute an action for me

Now we know the action works, the next step is to execute it via an agent. I’ve been using Goose lately as it connects easily with other MCP servers, so I thought this would be straightforward.

Sadly, I couldn’t get it to work, but here’s what I tried (it might work for you):-

  1. Copy your personal MCP server endpoint URL from the Zapier website:-
Copy URL

Get Goose up and running (see links at top of page for previous posts to discuss how to install Goose).

2. Add the extension into Goose using the goose configure command

3. Start up Goose and the extension by using the goose session command. See above image for details here (blurring out my MCP server key, obvs). Unfortunately goose wasn’t happy with that particular MCP server, so there’s where the experiment ends, but if you do get it working, you can move onto the next step.

4. Ask goose to do something e.g. send an email to Mailinator with the following text and test the content is correct on the email that lands in the inbox. text: example login email

Not sure why the action worked in Zapier but the server couldn’t be initialised in goose. If I find out, I’ll update this post.

Connect to Zapier MCP via Cursor.ai pt1 – annoying fail

What worked:-

  • editing the mcpserver settings
  • connecting to the mcp server

What didn’t work:-

  • Getting cursor.ai to connect to LLM to deliver the prompt – due to demand on the server I couldn’t actually complete this with my free stinking account so…

Connect to Zapier MCP via Cursor.ai Pro pt2 – success!

After taking the bait and upgrading my cursor.ai subscription to pro, this prompt worked great first time. Take a look at the video to see an example of the “human in the loop” pause before the zapier mcp server proceeds to send the email.

Being able to tweak the action in Zapier to give AI as much or as little freedom as you want could come in handy too. For example, you could ask AI to generate the content of an email so that you can get randomised test data:-

Or, you can be explicit and insist on the same hard coded email content every time, to ensure consistency.

Modify the action in Zapier to give or restrict AI freedom
resulting email sent by MCP to Mailinator

Summary

Definitely worth experimenting further with this – opens up a lot of existing actions where the work has already been done for you in Zapier to potentially connect to via the agent.

The safety break of not only having to supply the actions you wish to expose via the MCP server, but also configure them so that the user sees a preview could be incredibly useful when testing enterprise applications, or providing justification for the safety of using agentic ai to test things at work.

Happy testing!

Exploring Agentic AI with Block’s Goose and Selenium MCP: Tips and Demos

When I’m not spending my weekends on such life affirming tasks as taking son to football practice, watching Gladiators or drinking wine, I like to indulge in some hands on learning. At the moment its been focussed on chipping away at the ever expanding pool of knowledge surrounding AI and test automation. Here are some of my recent posts:-

https://beththetester.wordpress.com/2025/02/03/exploring-ai-with-github-browser-tips-and-demos/

https://beththetester.wordpress.com/2025/02/09/new-postman-ai-features-for-quality-engineers/

https://beththetester.wordpress.com/2025/02/03/exploring-ai-with-github-browser-tips-and-demos/

https://beththetester.wordpress.com/2024/11/30/creating-an-ai-assisted-test-framework-in-under-two-hours/

https://beththetester.wordpress.com/2024/11/17/exploring-ai-tools-and-their-applications/


For the last few weekends, I’ve been mucking about with Block’s open-source AI agent, Goose, integrated with Angie Jones’ Selenium MCP server.

TLDR: Video

The Setup

Goose is an interesting development from Block (formerly Square) that can dynamically load extensions and interact with various tools. For this experiment, I used the selenium-angie extension, which provides a suite of Selenium WebDriver commands wrapped in an AI-friendly interface. This means that Goose can perform selenium tasks such as opening a browser, clicking a button etc. by simply entering in a natural language prompt such as:-

Navigate to OrangeHRM demo site. Login using the credentials provided then logout.

Now, as Goose themselves admit, the focus for rollout of this new tool (was only released in February) was on Linux and Mac installations. As a Windows user, this meant getting the following to work was fiddly and (for me) quite hard work:-

Installing Goose – not currently available on Windows, so had to first run a few commands to install via wsl (something I hadn’t used before so was largely unfamiliar with)

open powershell admin session

wsl –install

curl -fsSL https://github.com/block/goose/releases/download/stable/download_cli.sh | bash

Configuring Goose – this was the least troublesome aspect as the cmd line interface was pretty user friendly. When they integrate the UI though it’ll be loads better.

Adding Extensions to Goose

As Angie Jones mentions (see sources for recent Github livestream) there are two main go to places to find Extensions (or MCP servers) for Goose.

Goose Itself
https://block.github.io/goose/v1/extensions/

Open source via Pulse

https://www.pulsemcp.com/servers

Each of these is a really great resource to explore to find Agent extensions you can plug into Goose to get it to assist you with certain tasks. However what I was most interested in was test automation, so when Angie said she was working on a Selenium Webdriver MCP server I knew I had to try it out.

I was able to quickly find her brand new Selenium Webdriver MCP server on Angie’s github repo and get it from there – her Readme file was super helpful:-
https://github.com/angiejones/mcp-selenium

Getting extensions working in Windows Goose was fiddly for someone unfamiliar with the process, but again, I’m sure this’ll get easier as the product develops.

For example, if you get an error when running Goose Session about an extension not working such as:-

Failed to start the MCP server from configuration Stdio(selenium-angie: npx -y @angiejones/mcp-selenium) `Call to ” failed for ‘initialize’. Error from mcp-server: Stdio process error: npm error code ERR_INVALID_URL\nnpm error Invalid URL\nnpm error

try installing nvm onto the session via:-

curl -o- https://raw.githubusercontent.com/nvm-sh/nvm/v0.39.3/install.sh | bash

source ~/.bashrc

nvm install node

nvm install –lts

then “goose session” should work

Adding additional installations in order for Goose to be able to work with the extension (e.g. I needed to install Chrome via WSL so that Selenium Webdriver could work). As I had Chrome installed on my machine I didn’t put two and two together and realise it also needed to be installed via WSL. Luckily Goose was able to point me in the right direction, but it wasn’t able to install it for me.

The Experiment

Using the demo HR website OrangeHRM tasked Goose with performing several common HR system operations:

  1. Logging into OrangeHRM using demo credentials
  2. Adding a new employee named “Deborah Shmeborah”
  3. Attempting to verify leave balances
  4. Successfully logging out

Observations

What’s fascinating about this approach is how Goose handles the automation steps:

  • It automatically structures the Selenium commands in a logical sequence
  • It handles element location using various strategies (XPath, CSS, name)
  • It can recover and attempt alternative approaches when initial attempts fail
  • It maintains context throughout the entire session

Technical Insights

The most frequently used Selenium commands were:

  • click_element for navigation and button interactions
  • send_keys for data input
  • find_element and get_element_text for verification attempts

Challenges and Learning

While Goose successfully handled basic operations, it did encounter some challenges with dynamic elements during the leave balance verification. This highlights an important aspect of AI-driven automation: the need for robust error handling and alternative approach strategies. At this stage, it really would have been much faster, at least in Windows, to just create a selenium framework and get it to do the same thing.

Conclusion

This experiment demonstrates the potential of agentic AI in test automation. While not perfect, tools like Goose show promise in making test automation more accessible and
maintainable. The integration with well-established testing resources like Angie Jones’ Selenium MCP provides a solid foundation for practical experimentation. I hope that open source tools like this will empower people who have good ideas but are light on the “how” of technical implementation to get something off the ground.

What excites me most is the potential for combining AI agents with traditional test automation approaches. As these tools evolve, they could significantly change how we app
roach software testing.

Sources

Huge thankyou to Angie Jones for what she is doing in this space, including raising the profile of Test Automation.

New Postman AI Features for Quality Engineers

I’ve done a few posts recently which document my continuing explorations into the world of AI for quality engineering tasks.

This will be a very short post, but there are a couple of new developments in Postman that I’ve been meaning to take a look at for the past few weeks. They recently introduced some tools to help support AI Agent connectivity and creation.

The two things I had a look at were:-

Postman Tool Generation API – using this in-built tool and a few drop downs, auto-generates you some boiler plate code you can use to integrate any of the 100K+ APIs into an AI Agent or LLM. Early days, but could be a real time saver if you wanted to try out any public APIs e.g. Mailinator. Only current code selections are JavaScript and Typescript but sure this will expand in time.

Postman AI Protocol – instead of creating a new request, workspace or collection, you now have the option of selecting “AI”. This allows you to create a single prompt that you can tweak and reuse across LLMs just by changing the model. See the video below where I try to use Anthropic creds for an OpenAI request, then without tweaking anything but the model name send the correct request.

There is also a Flow which provides outputs when several models are sent the same information – really handy if you’re testing model outputs.

Happy testing!

Exploring AI with GitHub Browser: Tips and Demos

Intro

This article discusses how to install and setup a GitHub Browser Use Agent to perform a basic test task.

TLDR: Video of how to setup and run GitHub Browser Use

Recently, I’ve been knocking around some of the newer tools on the market for AI such as Claude computer use https://beththetester.wordpress.com/2024/11/17/exploring-ai-tools-and-their-applications/.

Setup and overview

Continuing this theme, I thought I’d try out GitHub Browser Use. It took me a little while to figure out how to install the pre-requisites, where to update the OpenAI API key and task which I wanted the agent to do, and also find a suitable site to play with.

On my travels I discovered that the OrangeHRM demo site (used and loved by testers) is now behind a registration screen for a 30 day free trial.

BUT: I’ve just found an open-source demo version available: https://opensource-demo.orangehrmlive.com/web/index.php/auth/login. I hadn’t seen this yesterday so I decided to use Restful Booker.

First thing I tried was to ask it to make a booking. It failed miserably – utilising 80K tokens in the process of over 5 minutes of “thinking” about how to complete the task before I shut the agent down.

https://youtu.be/T4BL49W2iJA

Conclusion

If you see the vid at the top of the page you can see it processing the original query and where it went wrong – I think on reflection this isn’t necessarily an issue with the tool itself – this site is an example testing site which intentionally has bugs such as error messages that don’t really make sense (such as “must not be null” without any explanation of what must not be null). For sites which are a bit more productionised I’m guessing this will be less of a problem (although not eliminated entirely, human in the loop FTW!).

I’d also point out that I haven’t experimented with the more plausible type which is to ask the agent to perform this via API calls rather than trying to do things in the front end.

Happy Testing!